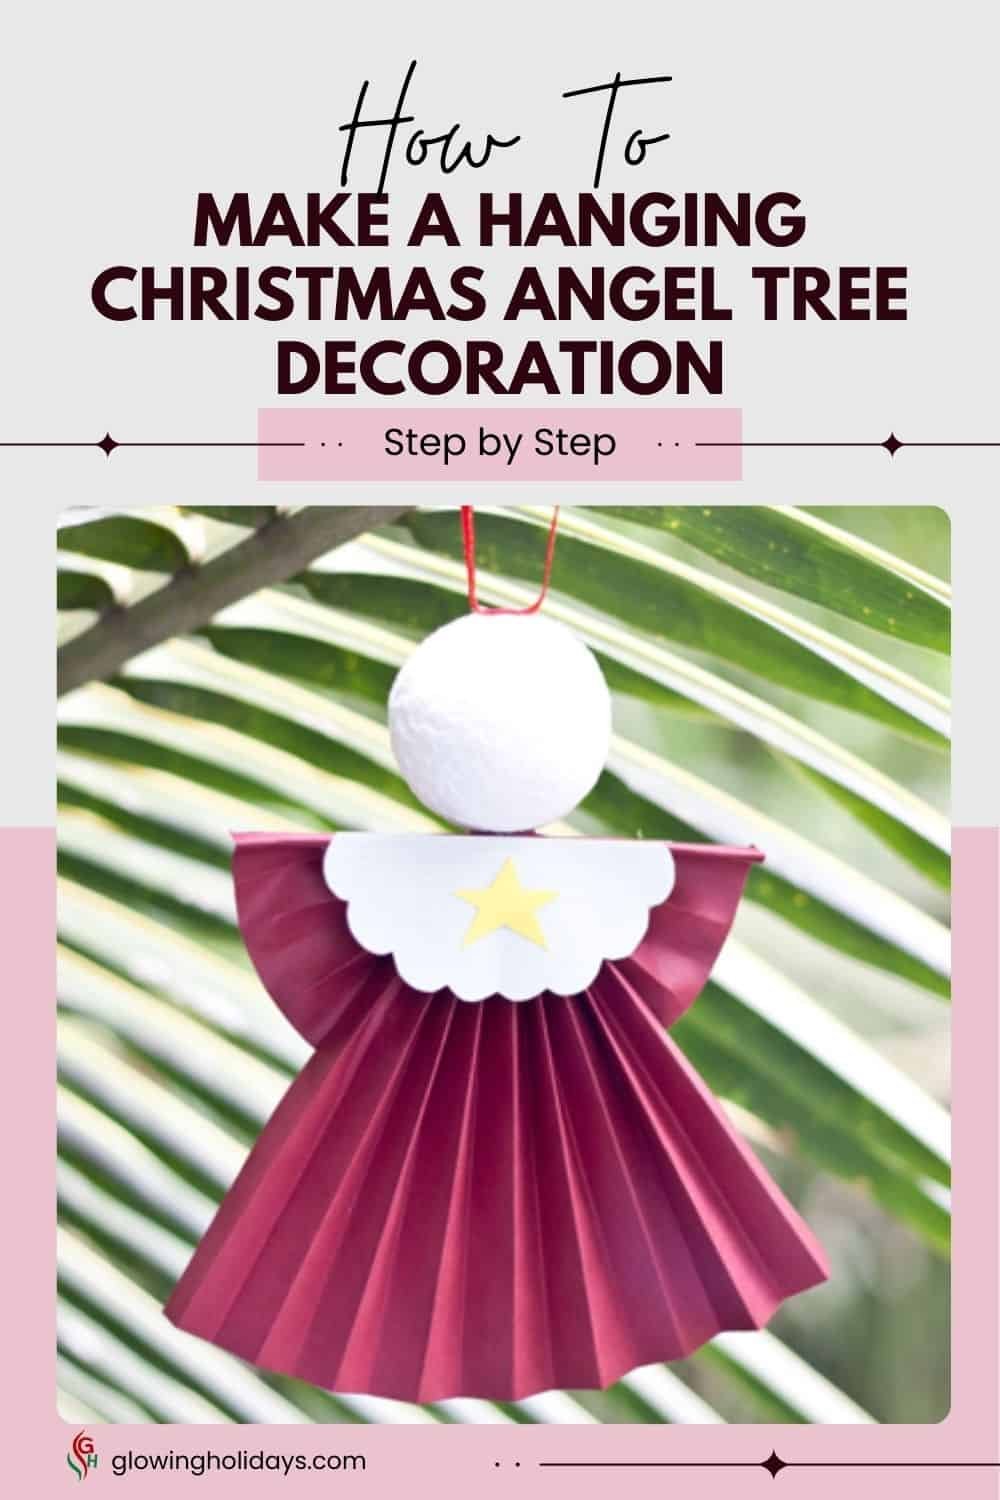
How to Make a Hanging Christmas Angel in 9 Steps
Are you interested in learning how to make a hanging Christmas angel? Then, this easy-to-follow tutorial is for you.
Making this charming hanging Christmas angel is easy. It requires very few supplies and can be completed in an hour or so.
To make this lovely angel, we need the following:
Supplies to Make a Hanging Christmas Angel
- Small styrofoam ball
- Popsicle stick
- Narrow red satin ribbon
- Sheet of red or maroon construction board
- A small piece of yellow construction paper
- Small piece of beige or white construction paper
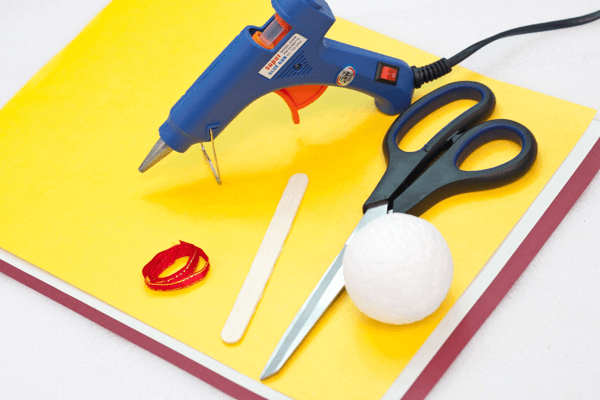
Tools to Make Your Angel
- A pair of scissors
- Hot glue gun
Gather your materials, and let’s get going.
Instructions to Make a Hanging Christmas Angel Ornament
We start by making the angel’s wings and robe. Then, we add the adornments, the angel’s head, and the ribbon on which the angel will hang on the Christmas tree.
Step 1 – Cut the maroon cardboard for the wings and robe.
Cut the red or maroon cardboard into two parts. One part should be one-third of the total size, with the other being two-thirds. The smaller piece should be a little longer than half the length of the popsicle stick.
Step 2 – Fold the paper for the wings.
Now, fold the smaller sheet of cardboard paper into several zigzags. The width of the zigzags can differ, but it is best to align it with the width of the popsicle stick.

Step 3 – Attach the wings to the popsicle stick to create the wings.
With your hot glue gun, glue one side of the folded paper to the popsicle stick.
Then, stretch the remaining portion of the zigzag cardboard to reach the other part of the popsicle stick (like in the picture above). Hot glue this portion of the zigzag cardboard to the popsicle stick.
Hold the popsicle stick and the paper tight for a few minutes until the glue has dried.
Now we have the angel’s wings. So, let’s make her robe.
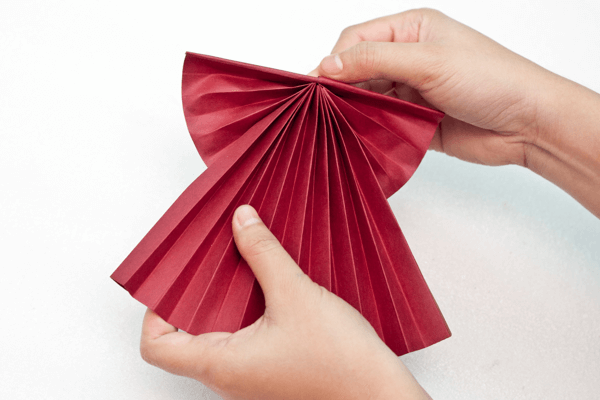
Step 4 – Fold the larger cardboard piece to create the robe.
Fold the larger maroon paper into a zigzag. The width of the zigzags should be the same as that of the angel’s wings.
Step 5 – Connect the robe to the arms.
Gather the ends of one side of the “robe paper” and hot glue it on the middle part of the popsicle stick where you glued the wings.
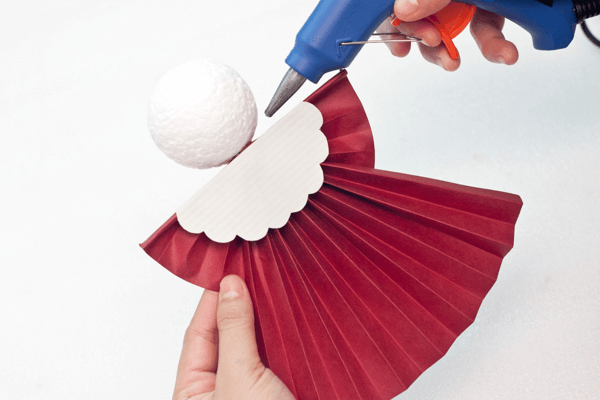
Step 6 – Add the angel’s beige bodice.
Cut a small concave from the white or beige construction paper. Cut a rounded or any design you like into the piece. Hot glue the concave paper on top of the angel’s body. The straight part of the concave should be parallel to the popsicle stick of the angel’s body.
Now, we have the upper body of the angel’s robe.

Step 7 – Add the angel’s head.
Glue the Styrofoam ball on the popsicle stick to create the angel’s head.
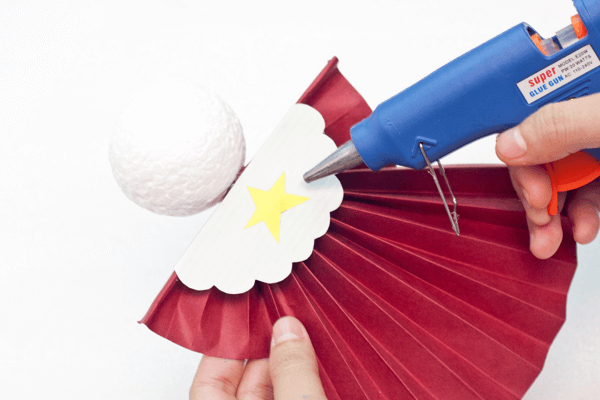
Step 8 – Add a star to the robe.
Cut a small star from the yellow construction paper and hot glue it onto the middle of the white or beige concave.
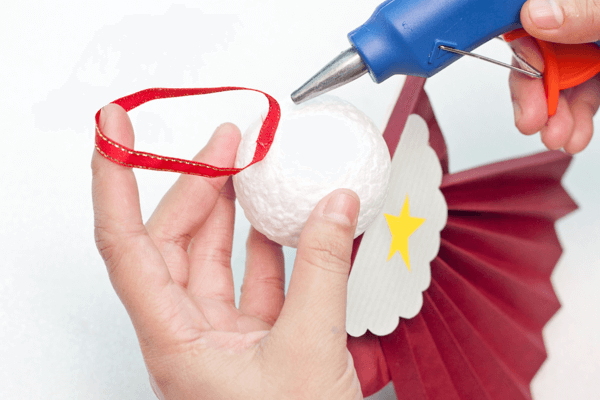
Step 9 – Add a ribbon to hang the angel to your tree.
Cut a small piece of red satin ribbon, glue the ends together, and then generously glue it to the top of the angel’s head.
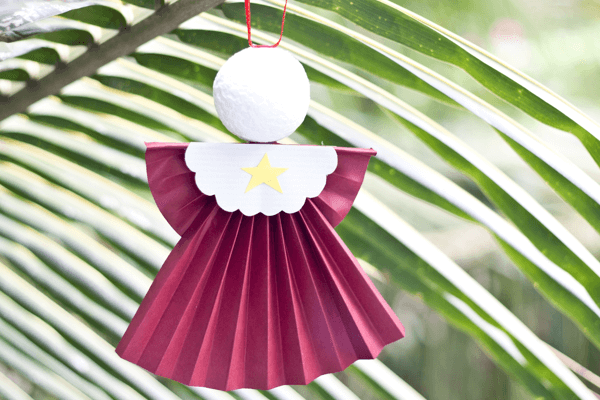
Finished. Well done!
In Conclusion
Now, decide where you want to hang your adorable Christmas angel.
Why not make a dozen or so and hang them on your tree? You can also buy A3 paper, make a much bigger angel, and hang it on your porch. These angels are cheap and straightforward to make and will add joy and Christmas spirit to your home this festive season.
So now that you know how easy it is to make this hanging Christmas angel, experiment with your designs and have fun.
You can make unusual colors or smaller or bigger ones. If you like the mint green Christmas ornaments I showed on this page, why not make the wings and robe of the angel mint green?
Check out our tutorial for making a charming snowman decoration for more Christmas craft ideas.