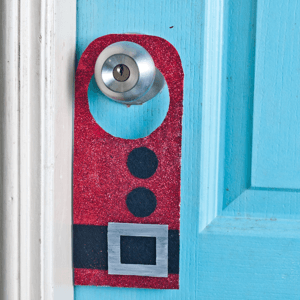
Make an Elegant Santa Claus Door Hanger (New Tutorial with Pictures)
A door hanger is an interesting addition to any holiday theme. This understated and elegant Santa Claus door hanger will fit any festive, traditional, or sleek holiday theme.
This cardboard door hanger will be a fun activity for kids and for all the kids at heart. This beautiful holiday-themed door hanger will brighten your door and spread the Christmas vibe.
First, decide where you want to hang this elegant Santa Claus door hanger. Is it for your office, your bedroom, or your family room? How many do you want to make? Then, let’s get started and put the material together.
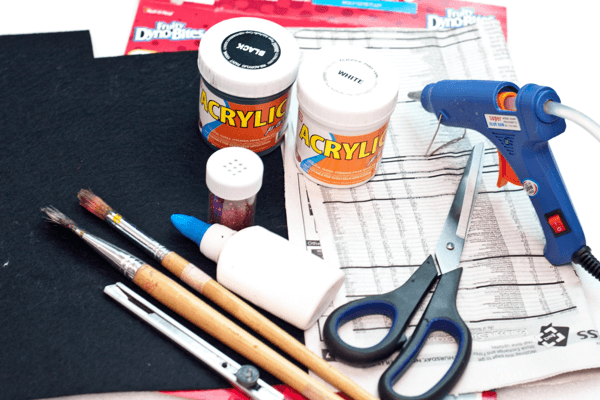
For 1 to 2 door hangers, this is what you need.
Supplies Needed to Make an Elegant Santa Claus Door Hanger
- An empty cereal or any other food box
- A piece of black crafting felt
- Black and white acrylic paint
- Red glitter
- Newspaper
- A round object close to the door handle’s size, like a sellotape or masking tape container.
Tools to Make the Door Hanger
- Paint brushes
- A cutter
- Pair of scissors
- A pencil
- White glue
- Hot glue gun
Now that you have all the supplies let’s get our hands dirty. 🙂
Steps to Make an Elegant Santa Claus Door Hanger
We will first cut the frame of the door hanger, and then we will decorate it. I like this elegantly understated look, but this is where you can let loose and be as creative as you want.
Step 1
Cut a rectangle from the empty cereal box 9 to 10 inches long and 4 inches wide. Now you have the main frame of your door hanger.
Step 2
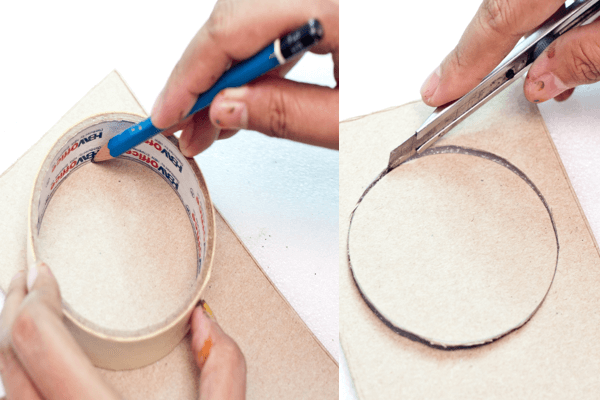
Trace the circle of the sellotape or masking tape container on the upper part of the cardboard hanger. Your objective here is to mark it and then cut a circle into the cardboard on which Santa will hang.
Once the perfect circle is marked, cut the circle into cardboard using the cutter.
Step 3
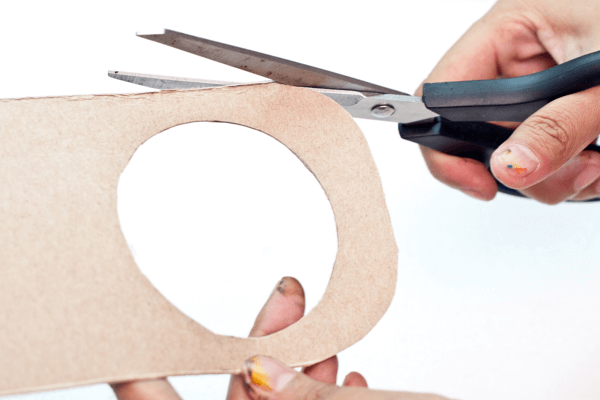
Curve the outer edges on the topmost part of the door hanger body. Do this on both edges to create a rounded edge.
Step 4
Now that we have the frame of the door handle, we’ll go ahead and decorate it.
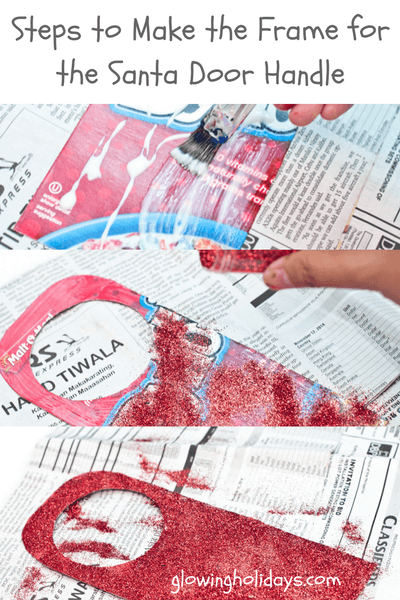
Generously apply white glue to one side of the door hanger and brush it evenly all over the frame.
Step 5
Sprinkle red glitter over the glue, covering the whole frame. Allow the glue and glitter to dry and settle on the door hanger’s frame for at least an hour.
Step 6
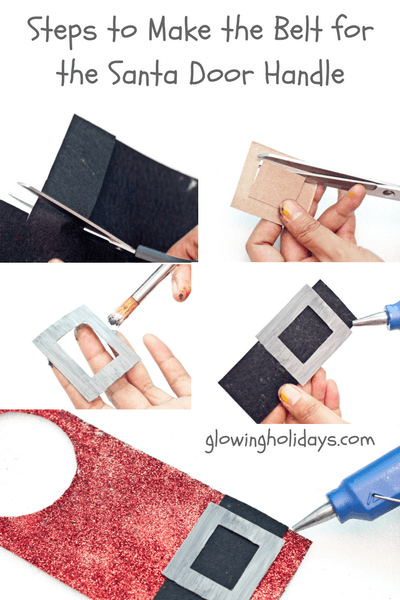
Cut a small strip of black felt. The width should be about 1 inch, and the length will depend on the width of the door hanger’s frame.
We now have Santa’s belt. Let’s get on with the belt buckle.
Step 7
Cut a small rectangular piece that is a bit wider than the width of the belt. Cut a smaller rectangular in the middle to create a hole. We now have the outline of the belt’s buckle.
Step 8
Mix white and a little bit of black paint to create gray acrylic paint. Paint the buckle with this and let it dry for about an hour.
Step 9
Hot glue the buckle on the belt and place the buckle close to one side. Then, hot glue the belt and buckle it onto the frame close to the bottom. Cut the excess of the belt if there is any.
Step 10
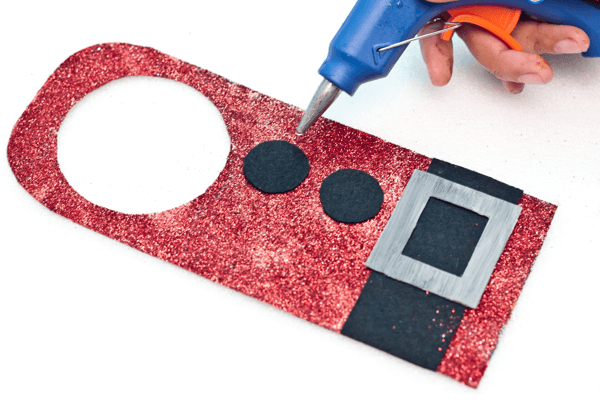
Cut two pieces of a black circle from the crafting felt for the buttons of Santa’s jacket. Hot glue these buttons onto the frame above and in line with the belt buckle.
Step 11
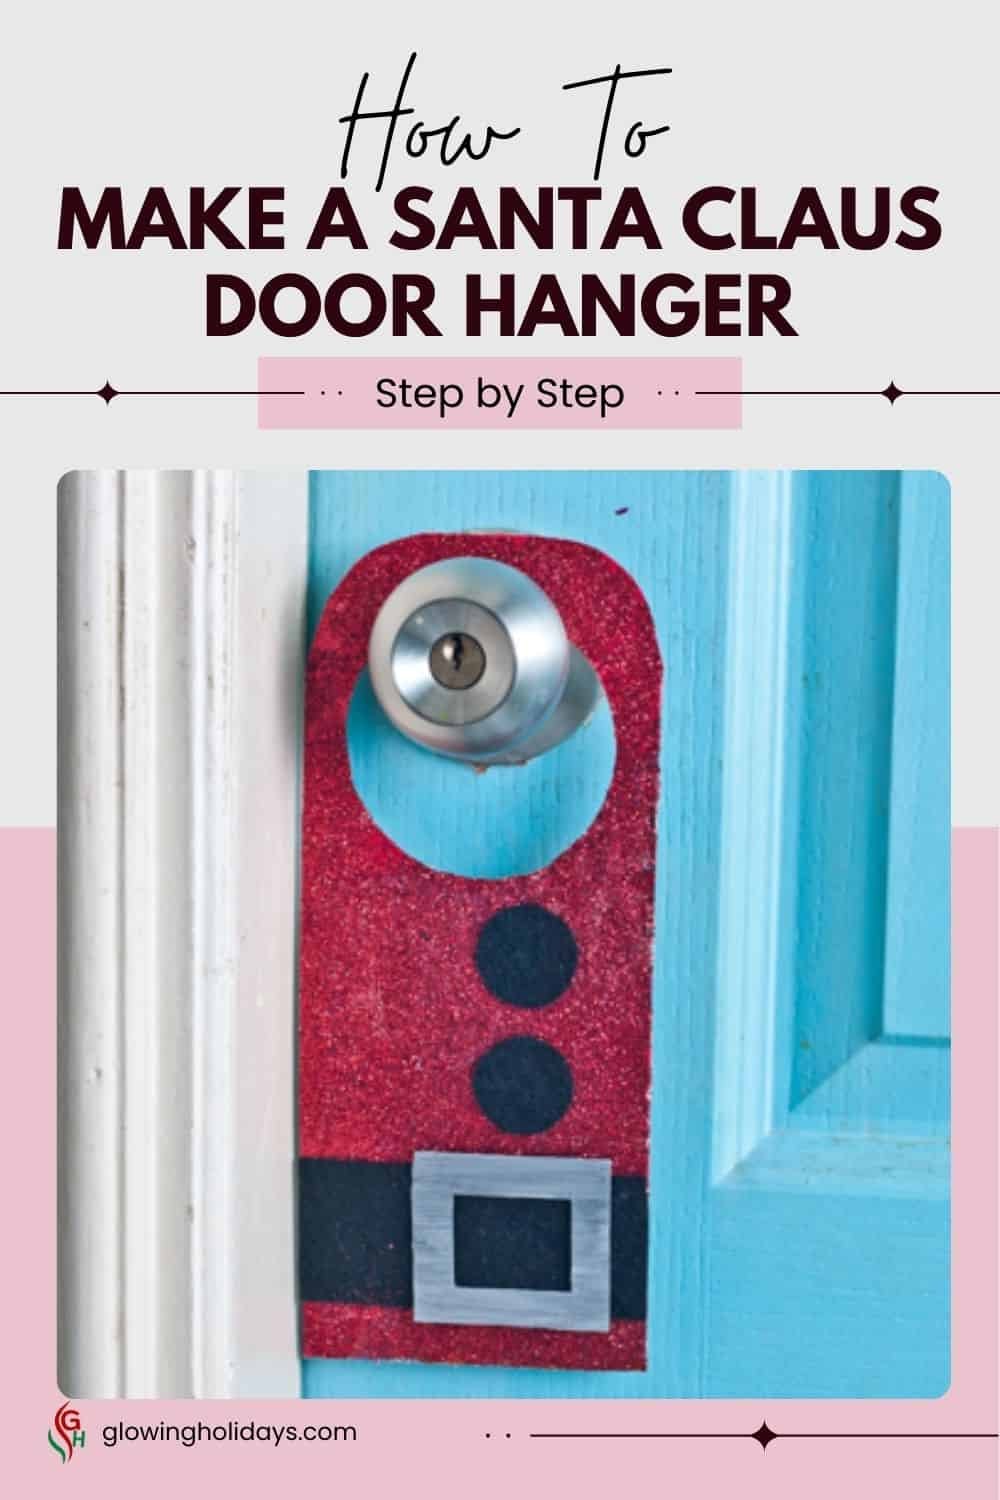
Hang the hanger on the door where you want it, and make sure it fits properly. If not, make any necessary adjustments. Hang it up and enjoy the festive season.
In Conclusion
This elegant Santa Claus door hanger is perfect for your home and also for spicing up your plain door at the office. It is a simple yet elegant way of decorating your door.
Why not get your kids or grandkids involved in making these Santa Claus door hangers and make a half dozen so there is one for their rooms as well?
You may also like our Santa Claus three-dimensional cards if you like the Santa holiday spirit.

